Friday, November 28, 2014

Dairy-Free Eggnog {No-Cook, Paleo, Sugar Free, Low Carb}

Originally posted at Tess and Tigerlily

Get ready for the quickly-approaching holidays with this super easy, no-cook, dairy free eggnog!

Last year I posted this tasty eggnog recipe that I made many times throughout the holiday season. My daughter and I both loved it! However, with my unpredictable episodes of lactose intolerance this year, I thought I'd have to skip this decadent favorite of mine.

But, luckily, there is coconut milk and coconut cream to save the day, making it possible to replicate the rich creaminess and flavor of the original recipe!

This recipe is very similar to the original. It still uses pasteurized liquid eggs to keep it quick, easy, and no-cook. Instead of whole milk, it uses full-fat canned coconut milk, And instead of heavy whipping cream, this recipe uses whipped coconut cream.

To maintain a totally sugar free version, use stevia as a sweetener. I've made this a few different ways: 10 drops liquid stevia; 2 tbsp powdered stevia; and a combination of stevia and maple syrup. I've found that powdered stevia isn't very consistent from brand to brand, so start with less, and add more to taste.

If you aren't concerned with sugar, use 1/4 cup of your sweetener of choice, adding more to taste. My favorite has been to use a combination 8 drops stevia with 1 tbsp maple syrup.

I've found that adding the prepared whipped coconut cream in after blending all the other ingredients provides a smoother texture than just adding coconut cream straight from the can right away.

Now, let's get started! You'll need:

1 can full-fat coconut milk
1 cup pasteurized liquid egg (like Redi-Egg)
1 tsp vanilla extract
1 tsp nutmeg
10 drops liquid stevia, or sweetener of choice (see note above)
Pinch of cinnamon
1 cup whipped coconut cream

According to these instructions, whip up your coconut cream until smooth and set aside (the quick version is to whip canned coconut cream until smooth and creamy.)

Blend remaining ingredients together in a blender until smooth.

Add whipped coconut cream, and blend again.

Pour into cups, chill if desired, and sprinkle with nutmeg before serving.

This eggnog has a much 'cleaner' and 'fresher' flavor than traditional, store-bought eggnog, but is still quite filling and delicious!

I hope you all had a delicious and grateful Thanksgiving!

Saturday, November 22, 2014

Apple "Nachos"

Originally Posted at Tess and Tigerlily

This hardly counts as a recipe; it's more of a tasty basic idea that you can adjust to make into your own delicious creation. I made this on the fly the other day during our weekly homeschool preschool days, and it was so good, we've been eating it regularly ever since!

This makes a tasty, light lunch, sweet snack, or a healthy dessert!

I've seen this idea floating around Pinterest here and there, so I admit this isn't some amazing, miraculous, unique idea of mine, but here's how I made my version:

You'll need:
-Apples (I used Honeycrisp, one small apple per child, two small or one large per adult)
-Almond Butter (sweeten with maple syrup, if desired)
-Caramel Sauce
-Full Fat Coconut Milk (sweeten with maple syrup or stevia and vanilla extract)
-Dark Chocolate Chips
-Raisins
-Pecans
-Cinnamon

Slice the apples in thin slices and arrange them evenly on a plate. Sprinkle with a dash of cinnamon. Mix the almond butter with maple syrup (if using) and plot a heaping spoonful in the middle. If your caramel sauce is refrigerated and thick (like the Trader Joe's one I use), warm a small bowl of it in the microwave for 30 seconds or so, unitl it melts to a more liquid consistency. Drizzle the caramel sauce over the apples. Whip a small bowl of full-fat coconut milk with vanilla and your sweetener of choice (I used a few drops of liquid stevia.) Drizzle the coconut milk over the apples. Top the apples with a small handful of the chocolate chips, peans, and raisins. Enjoy!

This is like a raw pie on a plate! But better. Raw pie on a plate probably wouldn't be very appetizing, come to think of it.

You can make this healthier by omitting the caramel sauce and chocolate chips. It would still be absolutely delicious! This is a great way to get some fruit in your diet, if you get easily bored of raw apples and bananas on a daily basis.

These fall days are flying by. Thanksgiving is just around the corner, which means this is sure to be a busy week. Wishing you all a tasty, warm, thankful Thanksgiving this coming Thu

Sunday, November 2, 2014

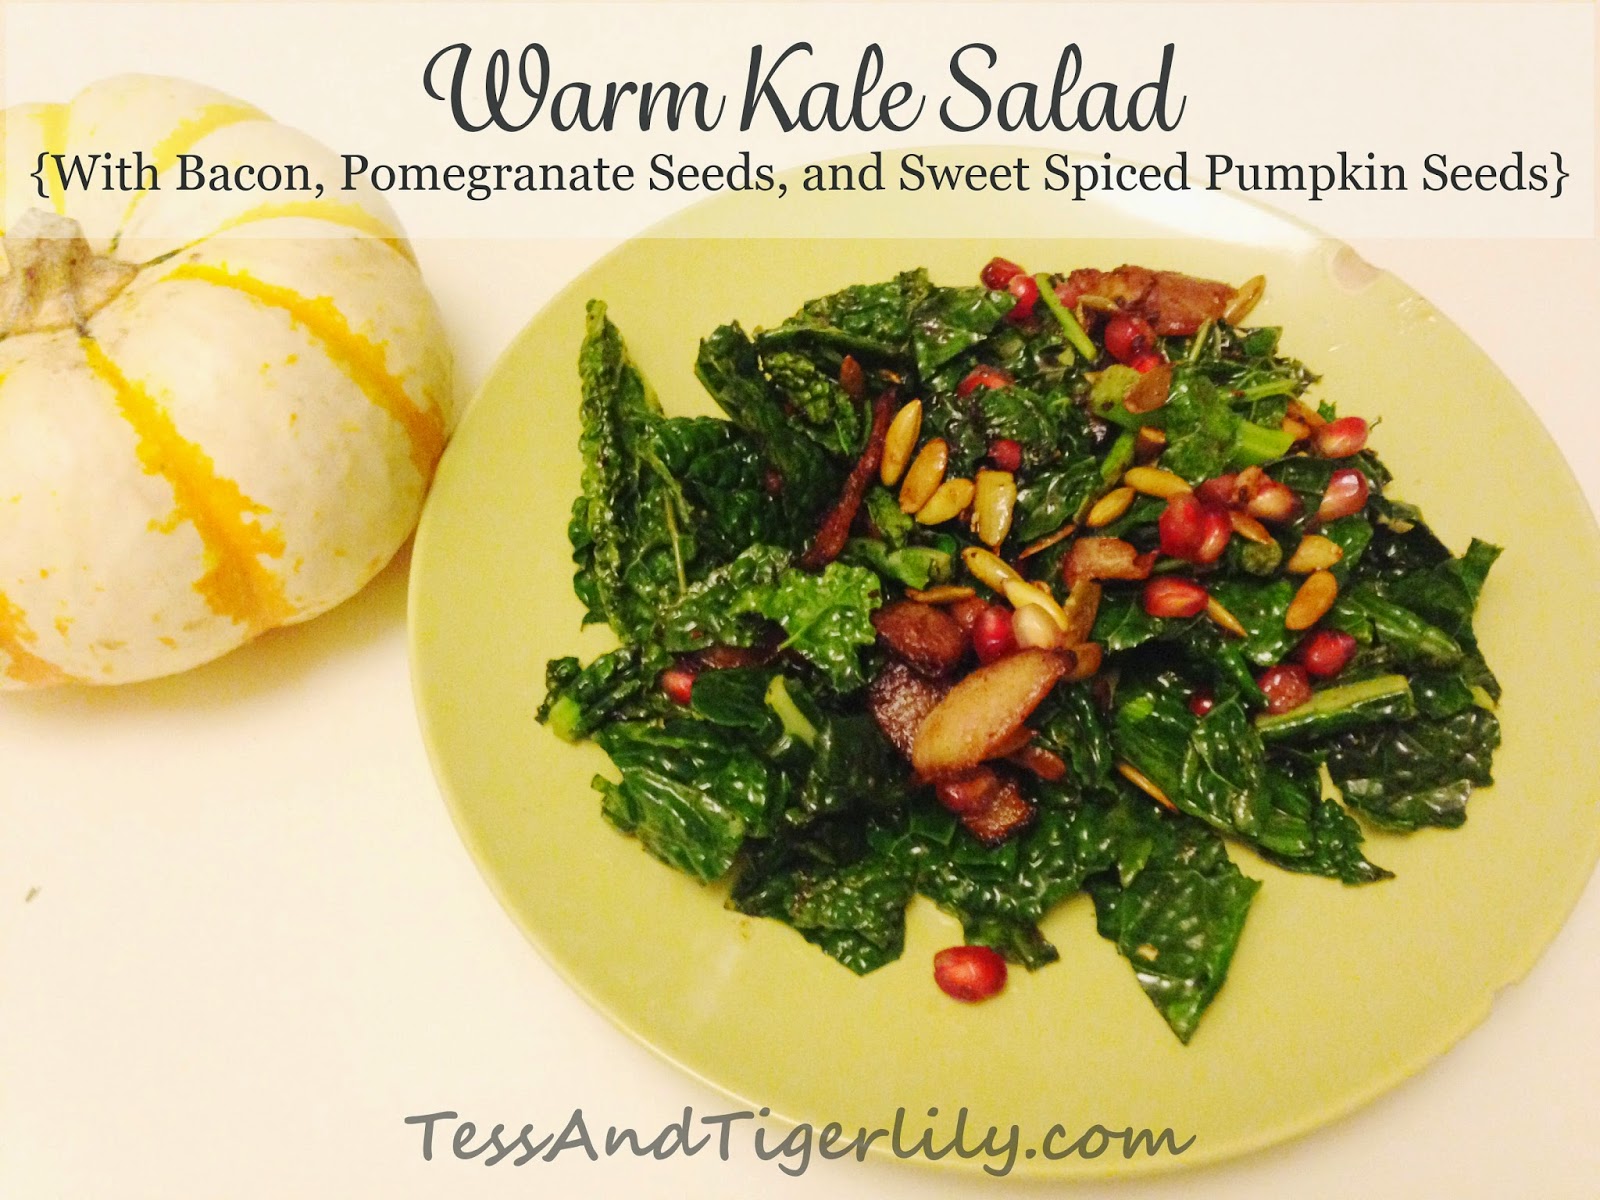
Warm Kale Salad {with bacon, pomegranate seeds, and spiced pumpkin seeds}

Originally posted at Tess and Tigerlily

This is a nice comfort-food salad for these cold, rainy fall days. On days like today, it's hard to crave something healthy like a green smoothie or a raw salad. This salad may not be the healthiest (depending on your diet/personal philosophy), but it sure gets a good dose of hearty greens in your body. You can make a heaping portion and eat it as a main dish, or serve it with something else, like spaghetti squash tossed in brown butter and sage.

Warm Kale Salad 
{Paleo, low carb, dairy free, gluten free}
serves 2 as a main, 4 as a side

This cozy salad includes bacon, kale, pomegranate seeds, and Pumpkin Pie Spiced Pumpkin Seeds (or plain pumpkin seeds.) I love keeping my home cooking quick and simple, but if you want to get fancy, add some garlic and shallots. Feel free to use any other hearty, leafy green you prefer! It doesn't need any seasoning, besides a dash of pepper, and perhaps a tiny pinch of salt (the bacon provides plenty of salty flavor), but I do love it tossed in a couple tablespoons of plain yogurt. It adds a yummy tang and a nice creamy texture. I don't actually do much measuring when I make this; I just add as much of each ingredient that I think my daughter and I will eat in one meal.

You will need:
4-6 strips of bacon, chopped in large chunks
3-4 large handfuls of kale
2 tbsp pomegranate seeds
1 tbsp Pumpkin Pie Spiced Pumpkin Seeds (or plain pumpkin seeds)

In a frying pan over medium heat, cook the bacon until crispy. Turn off heat and remove cooked bacon with a slotted spoon and lay out over a paper towel to drain. Drain any excess bacon fat, reserving about 2 tbsp in the pan. Toss the kale in the pan, massaging the bacon grease into the leaves until it wilts a bit. Add a pinch of pepper and any other seasonings you desire. Toss with the bacon, pomegranate seeds, and pumpkin seeds. Enjoy!

Thursday, October 23, 2014

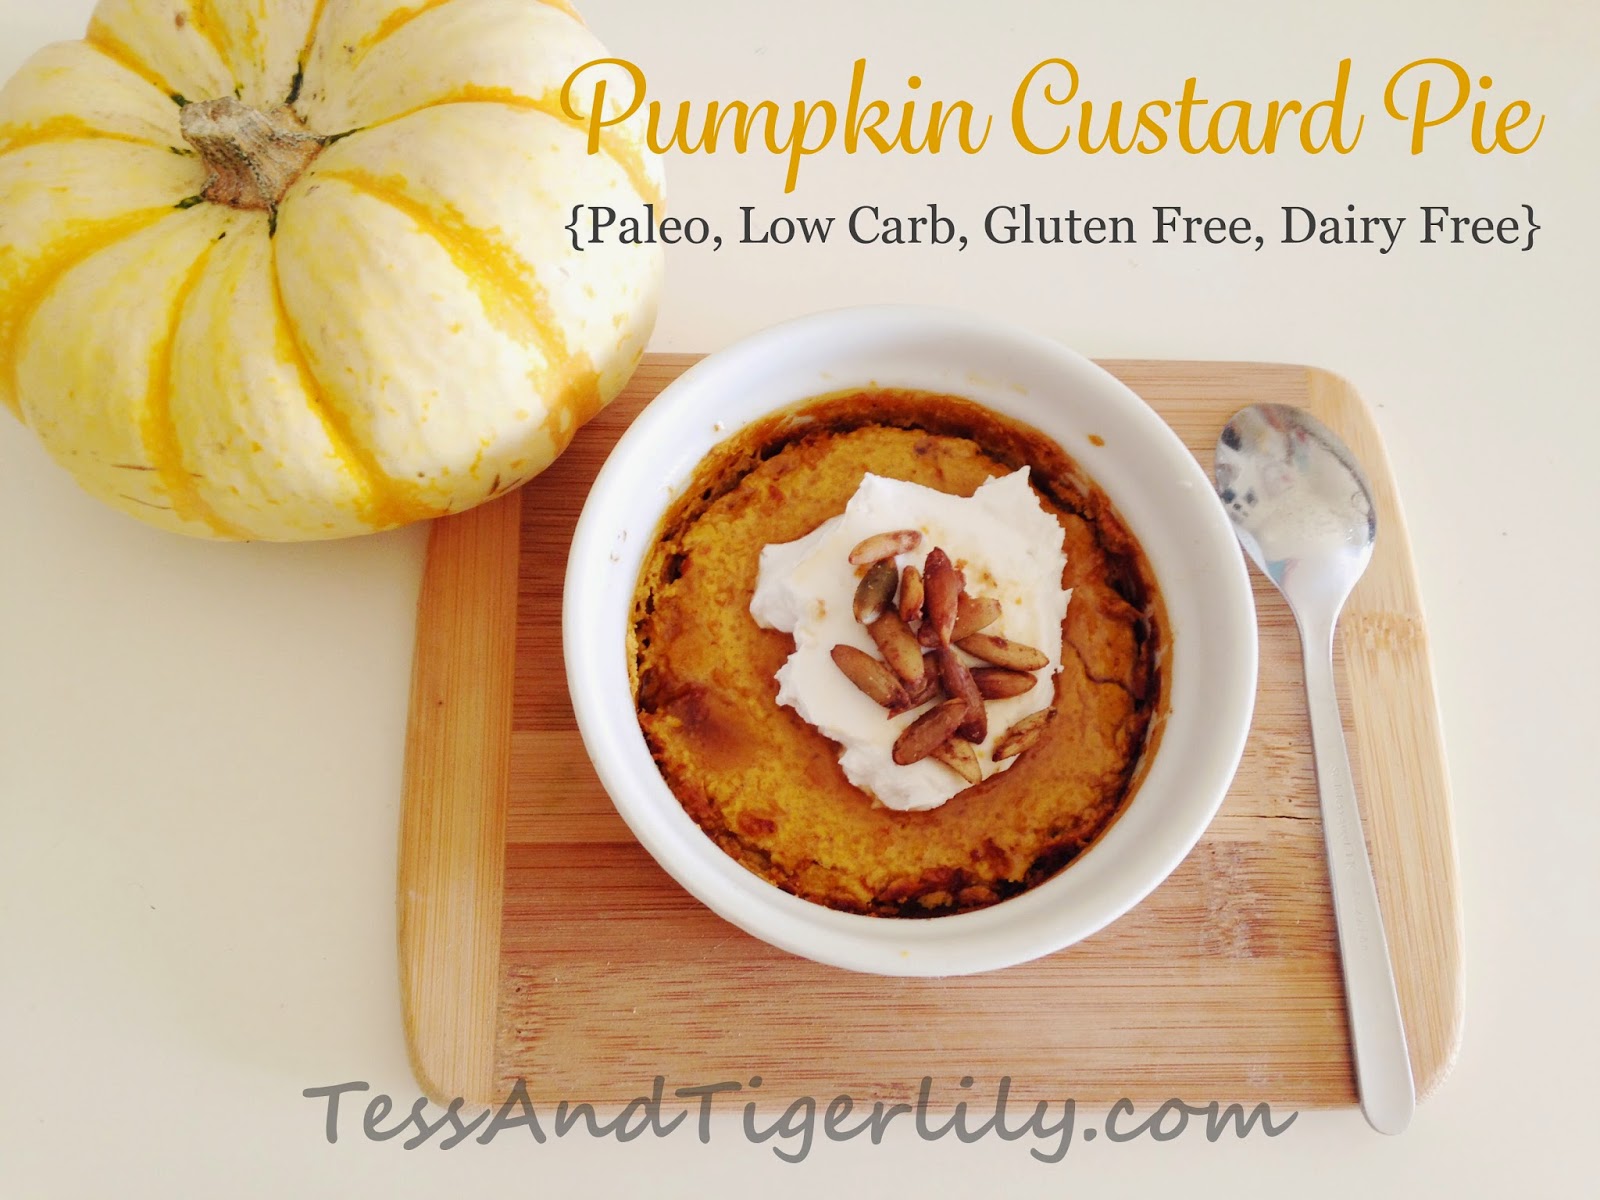
Pumpkin Custard Pie {Paleo, Low Carb, Gluten Free, Dairy Free}

Originally Posted at Tess and Tigerlily

Here's another pumpkin recipe! With all the pumpkin pie-eating going on around me, and all the lactose intolerance/low carb-eating going on in my body, I was once again compelled to make my own recipe that satisfied my cravings, used the ingredients I wanted to use, was easy, and tasted delicious.

This one delivers! Especially in the easy category. Most of the other custard recipes I found called for separating ingredients when mixing, and baking the ramekins in a dish surrounded by water. Sure, there are reasons for those extra measures, but this mama wants her pie NOW and she wants it EASY (insert hungry mom roar here.) Ok, so you still need to let it cool, unless you like it warm, but at least the preparation is as simple as blending the ingredients, pouring into ramekins, and baking. Done. Your turn!

Pumpkin Custard Pie
{Paleo, Low Carb, Gluten Free, Dairy Free, can be sugar free.}
Fills 4 medium/small ramekins

This recipe is basically a crust-less pumpkin pie. The ingredients are pretty darn healthy, so I didn't feel too bad about eating it for breakfast a couple times (sheepish grin). It uses pumpkin puree, coconut cream and coconut non-dairy beverage (if you aren't obsessed with coconut cream like I am, you can just sub 1 cup full fat coconut milk for the combo), and is sweetened with maple syrup. If you want a purely sugar free version, you can use stevia instead. My first version was sweetened with only stevia, but I found it lacking in the sweetness category, so I drizzled the finished product with a bit of maple syrup. It was delicious like that, but the second time around, I used maple syrup entirely.

1 cup pumpkin pruee
1/2 cup coconut cream
1/2 cup 'milk' (like coconut non-dairy beverage, almond milk, or milk if you do dairy)
2 eggs
2 tbsp maple syrup (or 8 drops liquid stevia, or a combo)
1 tsp vanilla
1 tsp pumpkin pie spice

Preheat oven to 350 degrees. Blend all ingredients together (I used a food processor) until smooth. Pour into ramekins about 2/3-3/4 full. Bake 25-30 minutes until center is firm with a slight jiggle. Let cool, and then transfer to fridge for an hour or more. When ready to serve, top with whipped coconut cream and pumpkin pie spiced pumpkin seeds.

I guarantee I'll be making this a lot over the next few months!

Thursday, October 16, 2014

Pumpkin Pie Spiced Pumpkin Seeds {Low Carb, Sugar Free, Paleo}

Originally Posted at Tess And Tigerlily

'Tis the season to be tempted by EVERYTHING sweet and pumpkin-y all around me! Pumpkin goodness is everywhere, especially being a Trader Joe's employee. And since I'm now eating more of a Paleo/Low Carb diet, I'm avoiding many of these delicious temptations. However, I do allow myself tastes and samples when the chance appears.

One thing I tried was TJs new Pumpkin Spiced Pumpkin Seeds. They were sweet, candied pumpkin seeds seasoned with pumpkin pie spice. I enjoyed my small sample, but honestly, they were too sweet for my liking. I liked the concept, but I personally preferred something that would be more versatile for both sweet and savory dishes alike, as well as contain less sugar.

So I made my own version!


Pumpkin Pie Spiced Pumpkin Seeds
I tried these two ways; sweetened with powdered stevia for a totally sugar free version, and sweetened with maple syrup, and I honestly preferred the stevia version! But if you need a little extra sweetness, maple syrup is a tasty alternative as well.

1 Cup Raw Pumpkin Seeds
1 Tbsp Coconut Oil (or butter, if you do dairy)
1 Tsp Pumpkin Pie Spice
1/2 Tsp Salt
1/4 Tsp powdered Stevia (or 2 Tsp maple syrup)

Heat the oil or butter over medium heat, and then add the pumpkin seeds, stir until well-coated in oil/butter. Add your salt and pumpkin pie spice, and mix together. Toast seeds for about 5 minutes, until well-toasted (less, if you prefer softer seeds, more if you like them really crunchy.) Once toasted, remove from heat and add your powdered stevia or maple syrup, and mix. Transfer to a cookie sheet or parchment paper, spreading the seeds out in a thin layer, to cool.

November could hardly wait until they cooled down, and snacked on them warm and toasty! These make a great snack as is, and can be added as a topping for salads, soups, and desserts! I have a couple recipes I used these in that I'm looking forward to posting. Stay tuned!

Friday, October 10, 2014

Whipped Coconut Cream {Paleo, Low Carb, Vegan, Sugar Free}

Originally Posted at Tess And Tigerlily

Coconut Cream has become my current obsession, especially with my growing sensitivity to dairy (no, why????!!!) I plan on figuring out which forms of dairy I can handle (yogurt and butter seem fine), but in the meantime, I'm avoiding most forms of dairy. 

Coconut cream is pure magic. It's heavenly. Coconut cream is the heavy whipping cream of the non-dairy world. It is perfect for stirring into tea and coffee in place of creamer, great in baked goods, adds rich creaminess to smoothies, and is the lactose-intolerant's best friend for replacing whipped cream.

Where the heck do you find coconut cream?! I get mine at Trader Joe's, where this part-time-working mama works (no, they don't pay me for the millions of times I showcase TJs products on my blog, I do it out of convenience as well as heartfelt enjoyment of their products. Now, if they did pay me for all the extra love I send their way in addition to my hourly wages...wouldn't that be a sweet deal?), but you can also find coconut cream at health food stores and even amazon

If you absolutely cannot find coconut cream, (or want a pure, organic version; TJs is NOT organic and contains a couple 'fillers') there's help! You can make it from regular old FULL-FAT coconut milk! Simply buy a can or two and store them in the fridge for a day (or more). When ready to use, remove from fridge, and WITHOUT SHAKING/MIXING them, open the cans and scoop out the thick cream that has risen to the top. The watery part of the coconut milk will be at the bottom. Store the cream portion separately, and use to make coconut whipped cream! You can save the water portion for smoothies.

Whipped Coconut Cream
Being a single mama, I like to make things in smaller portions, so I only make my whipped coconut cream about 1 cup at a time. You can double or even triple this recipe for larger supply. Use it to top fresh baked holiday pies! You can also stir it into tea and coffee.

1 Cup Coconut cream
1/8 tsp Vanilla
2-4 drops stevia (or 1/2 tsp maple syrup, or sweetener of choice)

Whisk all ingredients together until smooth and creamy. You can start using it immediately, but I find that the texture improves if you put it back in the fridge for 20 minutes or more, and then whisk again. You will have thick, whipped coconut cream that totally hold its shape on a slice of pie!

I dare you not to get hooked on this tasty stuff!

Thursday, October 9, 2014

Letter of the Day Sugar Cookies {with Naturally Colored Icing!}

Originally posted at Tess And Tigerlily
 
If you've read my last two posts about starting to do preschool activities at home (read part one, and part two), you know that we are starting small with simple ways to incorporate learning with play.

It was day one of my friend, Robin, and my homeschool preschool experiment with our two daughters. We started off with preschool-age story time at our local library, where the theme was Dragons and Castles and the Letter D. The girls had a great time listening to a couple stories and singing along with the songs. Afterward, we went back to my house and decided to carry on with the Letter D theme and make Letter D and Dinosaur sugar cookies!

I made use of this awesome cookie cutter set, made a simple batch of sugar cookies, and frosted them with naturally colored icing!

Naturally Colored Icing
This is more of an idea than a recipe, since I didn't measure anything (that tends to be my default cooking and baking mode!), but this was so foolproof, and it can be changed to meet your icing needs, whether it be for sugar cookies, cupcakes, or birthday cakes. The best part is, the coloring used is real fruit and I actually flavors the icing! If you want a deep, rich concentration of color, you can use less powdered sugar and more of the fruit powder (or try using only fruit powder to eliminate refined sugar.) If you want a pastel color, only a little fruit powder is needed.

You'll need:
-Heavy Whipping Cream (or Coconut Cream for dairy free)
-Powdered Sugar
-Freeze dried raspberries or strawberries (for red or pink)
-Freeze dried blueberries (for blue or purple)

First, grind about 1/4 cup of each of the freeze dried fruits in a spice or coffee grinder (I used my baby bullet) until it becomes a fine powder. Next combine about 1/4 cup heavy cream with a couple tbsp powdered sugar until it reaches the icing consistency your are looking for. Finally, add some of the freeze dried berry powder, 1/4 tsp at a time, until the frosting reaches the desired color. Repeat for other color. When you're ready to ice your cookies, pour each color of frosting into plastic ziplock bags, make a small snip in the corner, and use them as piping bags!

This icing turned out delicious! Trader Joe's and even Target have many different varieties of freeze dried fruits, so I look forward to trying this again with other fruits and colors.

The girls had a great time frosting their own cookies (we moms helped too, of course), and had even more fun eating them. While we worked on our cookies, we talked about other things that start with Letter D. Mila answered most of the questions, since she's the older of the two girls, but November listened, and remembered some of what she heard. It gave me a glimpse at the benefits of schooling children of multiple age ranges together.

Afterward, we got some energy out at open play at Seattle Gymnastics, and afterward November and I went home for a nice long nap. It sure was a great start to our homeschool experiment! And this simple and tasty project will be so much fun to replicate again in the future and for holidays!