Friday, November 28, 2014

Dairy-Free Eggnog {No-Cook, Paleo, Sugar Free, Low Carb}

Originally posted at Tess and Tigerlily

Get ready for the quickly-approaching holidays with this super easy, no-cook, dairy free eggnog!

Last year I posted this tasty eggnog recipe that I made many times throughout the holiday season. My daughter and I both loved it! However, with my unpredictable episodes of lactose intolerance this year, I thought I'd have to skip this decadent favorite of mine.

But, luckily, there is coconut milk and coconut cream to save the day, making it possible to replicate the rich creaminess and flavor of the original recipe!

This recipe is very similar to the original. It still uses pasteurized liquid eggs to keep it quick, easy, and no-cook. Instead of whole milk, it uses full-fat canned coconut milk, And instead of heavy whipping cream, this recipe uses whipped coconut cream.

To maintain a totally sugar free version, use stevia as a sweetener. I've made this a few different ways: 10 drops liquid stevia; 2 tbsp powdered stevia; and a combination of stevia and maple syrup. I've found that powdered stevia isn't very consistent from brand to brand, so start with less, and add more to taste.

If you aren't concerned with sugar, use 1/4 cup of your sweetener of choice, adding more to taste. My favorite has been to use a combination 8 drops stevia with 1 tbsp maple syrup.

I've found that adding the prepared whipped coconut cream in after blending all the other ingredients provides a smoother texture than just adding coconut cream straight from the can right away.

Now, let's get started! You'll need:

1 can full-fat coconut milk
1 cup pasteurized liquid egg (like Redi-Egg)
1 tsp vanilla extract
1 tsp nutmeg
10 drops liquid stevia, or sweetener of choice (see note above)
Pinch of cinnamon
1 cup whipped coconut cream

According to these instructions, whip up your coconut cream until smooth and set aside (the quick version is to whip canned coconut cream until smooth and creamy.)

Blend remaining ingredients together in a blender until smooth.

Add whipped coconut cream, and blend again.

Pour into cups, chill if desired, and sprinkle with nutmeg before serving.

This eggnog has a much 'cleaner' and 'fresher' flavor than traditional, store-bought eggnog, but is still quite filling and delicious!

I hope you all had a delicious and grateful Thanksgiving!

Saturday, November 22, 2014

Apple "Nachos"

Originally Posted at Tess and Tigerlily

This hardly counts as a recipe; it's more of a tasty basic idea that you can adjust to make into your own delicious creation. I made this on the fly the other day during our weekly homeschool preschool days, and it was so good, we've been eating it regularly ever since!

This makes a tasty, light lunch, sweet snack, or a healthy dessert!

I've seen this idea floating around Pinterest here and there, so I admit this isn't some amazing, miraculous, unique idea of mine, but here's how I made my version:

You'll need:
-Apples (I used Honeycrisp, one small apple per child, two small or one large per adult)
-Almond Butter (sweeten with maple syrup, if desired)
-Caramel Sauce
-Full Fat Coconut Milk (sweeten with maple syrup or stevia and vanilla extract)
-Dark Chocolate Chips
-Raisins
-Pecans
-Cinnamon

Slice the apples in thin slices and arrange them evenly on a plate. Sprinkle with a dash of cinnamon. Mix the almond butter with maple syrup (if using) and plot a heaping spoonful in the middle. If your caramel sauce is refrigerated and thick (like the Trader Joe's one I use), warm a small bowl of it in the microwave for 30 seconds or so, unitl it melts to a more liquid consistency. Drizzle the caramel sauce over the apples. Whip a small bowl of full-fat coconut milk with vanilla and your sweetener of choice (I used a few drops of liquid stevia.) Drizzle the coconut milk over the apples. Top the apples with a small handful of the chocolate chips, peans, and raisins. Enjoy!

This is like a raw pie on a plate! But better. Raw pie on a plate probably wouldn't be very appetizing, come to think of it.

You can make this healthier by omitting the caramel sauce and chocolate chips. It would still be absolutely delicious! This is a great way to get some fruit in your diet, if you get easily bored of raw apples and bananas on a daily basis.

These fall days are flying by. Thanksgiving is just around the corner, which means this is sure to be a busy week. Wishing you all a tasty, warm, thankful Thanksgiving this coming Thu

Sunday, November 2, 2014

Warm Kale Salad {with bacon, pomegranate seeds, and spiced pumpkin seeds}

Originally posted at Tess and Tigerlily

This is a nice comfort-food salad for these cold, rainy fall days. On days like today, it's hard to crave something healthy like a green smoothie or a raw salad. This salad may not be the healthiest (depending on your diet/personal philosophy), but it sure gets a good dose of hearty greens in your body. You can make a heaping portion and eat it as a main dish, or serve it with something else, like spaghetti squash tossed in brown butter and sage.

Warm Kale Salad 
{Paleo, low carb, dairy free, gluten free}
serves 2 as a main, 4 as a side

This cozy salad includes bacon, kale, pomegranate seeds, and Pumpkin Pie Spiced Pumpkin Seeds (or plain pumpkin seeds.) I love keeping my home cooking quick and simple, but if you want to get fancy, add some garlic and shallots. Feel free to use any other hearty, leafy green you prefer! It doesn't need any seasoning, besides a dash of pepper, and perhaps a tiny pinch of salt (the bacon provides plenty of salty flavor), but I do love it tossed in a couple tablespoons of plain yogurt. It adds a yummy tang and a nice creamy texture. I don't actually do much measuring when I make this; I just add as much of each ingredient that I think my daughter and I will eat in one meal.

You will need:
4-6 strips of bacon, chopped in large chunks
3-4 large handfuls of kale
2 tbsp pomegranate seeds
1 tbsp Pumpkin Pie Spiced Pumpkin Seeds (or plain pumpkin seeds)

In a frying pan over medium heat, cook the bacon until crispy. Turn off heat and remove cooked bacon with a slotted spoon and lay out over a paper towel to drain. Drain any excess bacon fat, reserving about 2 tbsp in the pan. Toss the kale in the pan, massaging the bacon grease into the leaves until it wilts a bit. Add a pinch of pepper and any other seasonings you desire. Toss with the bacon, pomegranate seeds, and pumpkin seeds. Enjoy!

Thursday, October 23, 2014

Pumpkin Custard Pie {Paleo, Low Carb, Gluten Free, Dairy Free}

Originally Posted at Tess and Tigerlily

Here's another pumpkin recipe! With all the pumpkin pie-eating going on around me, and all the lactose intolerance/low carb-eating going on in my body, I was once again compelled to make my own recipe that satisfied my cravings, used the ingredients I wanted to use, was easy, and tasted delicious.

This one delivers! Especially in the easy category. Most of the other custard recipes I found called for separating ingredients when mixing, and baking the ramekins in a dish surrounded by water. Sure, there are reasons for those extra measures, but this mama wants her pie NOW and she wants it EASY (insert hungry mom roar here.) Ok, so you still need to let it cool, unless you like it warm, but at least the preparation is as simple as blending the ingredients, pouring into ramekins, and baking. Done. Your turn!

Pumpkin Custard Pie
{Paleo, Low Carb, Gluten Free, Dairy Free, can be sugar free.}
Fills 4 medium/small ramekins

This recipe is basically a crust-less pumpkin pie. The ingredients are pretty darn healthy, so I didn't feel too bad about eating it for breakfast a couple times (sheepish grin). It uses pumpkin puree, coconut cream and coconut non-dairy beverage (if you aren't obsessed with coconut cream like I am, you can just sub 1 cup full fat coconut milk for the combo), and is sweetened with maple syrup. If you want a purely sugar free version, you can use stevia instead. My first version was sweetened with only stevia, but I found it lacking in the sweetness category, so I drizzled the finished product with a bit of maple syrup. It was delicious like that, but the second time around, I used maple syrup entirely.

1 cup pumpkin pruee
1/2 cup coconut cream
1/2 cup 'milk' (like coconut non-dairy beverage, almond milk, or milk if you do dairy)
2 eggs
2 tbsp maple syrup (or 8 drops liquid stevia, or a combo)
1 tsp vanilla
1 tsp pumpkin pie spice

Preheat oven to 350 degrees. Blend all ingredients together (I used a food processor) until smooth. Pour into ramekins about 2/3-3/4 full. Bake 25-30 minutes until center is firm with a slight jiggle. Let cool, and then transfer to fridge for an hour or more. When ready to serve, top with whipped coconut cream and pumpkin pie spiced pumpkin seeds.

I guarantee I'll be making this a lot over the next few months!

Thursday, October 16, 2014

Pumpkin Pie Spiced Pumpkin Seeds {Low Carb, Sugar Free, Paleo}

Originally Posted at Tess And Tigerlily

'Tis the season to be tempted by EVERYTHING sweet and pumpkin-y all around me! Pumpkin goodness is everywhere, especially being a Trader Joe's employee. And since I'm now eating more of a Paleo/Low Carb diet, I'm avoiding many of these delicious temptations. However, I do allow myself tastes and samples when the chance appears.

One thing I tried was TJs new Pumpkin Spiced Pumpkin Seeds. They were sweet, candied pumpkin seeds seasoned with pumpkin pie spice. I enjoyed my small sample, but honestly, they were too sweet for my liking. I liked the concept, but I personally preferred something that would be more versatile for both sweet and savory dishes alike, as well as contain less sugar.

So I made my own version!


Pumpkin Pie Spiced Pumpkin Seeds
I tried these two ways; sweetened with powdered stevia for a totally sugar free version, and sweetened with maple syrup, and I honestly preferred the stevia version! But if you need a little extra sweetness, maple syrup is a tasty alternative as well.

1 Cup Raw Pumpkin Seeds
1 Tbsp Coconut Oil (or butter, if you do dairy)
1 Tsp Pumpkin Pie Spice
1/2 Tsp Salt
1/4 Tsp powdered Stevia (or 2 Tsp maple syrup)

Heat the oil or butter over medium heat, and then add the pumpkin seeds, stir until well-coated in oil/butter. Add your salt and pumpkin pie spice, and mix together. Toast seeds for about 5 minutes, until well-toasted (less, if you prefer softer seeds, more if you like them really crunchy.) Once toasted, remove from heat and add your powdered stevia or maple syrup, and mix. Transfer to a cookie sheet or parchment paper, spreading the seeds out in a thin layer, to cool.

November could hardly wait until they cooled down, and snacked on them warm and toasty! These make a great snack as is, and can be added as a topping for salads, soups, and desserts! I have a couple recipes I used these in that I'm looking forward to posting. Stay tuned!

Friday, October 10, 2014

Whipped Coconut Cream {Paleo, Low Carb, Vegan, Sugar Free}

Originally Posted at Tess And Tigerlily

Coconut Cream has become my current obsession, especially with my growing sensitivity to dairy (no, why????!!!) I plan on figuring out which forms of dairy I can handle (yogurt and butter seem fine), but in the meantime, I'm avoiding most forms of dairy. 

Coconut cream is pure magic. It's heavenly. Coconut cream is the heavy whipping cream of the non-dairy world. It is perfect for stirring into tea and coffee in place of creamer, great in baked goods, adds rich creaminess to smoothies, and is the lactose-intolerant's best friend for replacing whipped cream.

Where the heck do you find coconut cream?! I get mine at Trader Joe's, where this part-time-working mama works (no, they don't pay me for the millions of times I showcase TJs products on my blog, I do it out of convenience as well as heartfelt enjoyment of their products. Now, if they did pay me for all the extra love I send their way in addition to my hourly wages...wouldn't that be a sweet deal?), but you can also find coconut cream at health food stores and even amazon

If you absolutely cannot find coconut cream, (or want a pure, organic version; TJs is NOT organic and contains a couple 'fillers') there's help! You can make it from regular old FULL-FAT coconut milk! Simply buy a can or two and store them in the fridge for a day (or more). When ready to use, remove from fridge, and WITHOUT SHAKING/MIXING them, open the cans and scoop out the thick cream that has risen to the top. The watery part of the coconut milk will be at the bottom. Store the cream portion separately, and use to make coconut whipped cream! You can save the water portion for smoothies.

Whipped Coconut Cream
Being a single mama, I like to make things in smaller portions, so I only make my whipped coconut cream about 1 cup at a time. You can double or even triple this recipe for larger supply. Use it to top fresh baked holiday pies! You can also stir it into tea and coffee.

1 Cup Coconut cream
1/8 tsp Vanilla
2-4 drops stevia (or 1/2 tsp maple syrup, or sweetener of choice)

Whisk all ingredients together until smooth and creamy. You can start using it immediately, but I find that the texture improves if you put it back in the fridge for 20 minutes or more, and then whisk again. You will have thick, whipped coconut cream that totally hold its shape on a slice of pie!

I dare you not to get hooked on this tasty stuff!

Thursday, October 9, 2014

Letter of the Day Sugar Cookies {with Naturally Colored Icing!}

Originally posted at Tess And Tigerlily
 
If you've read my last two posts about starting to do preschool activities at home (read part one, and part two), you know that we are starting small with simple ways to incorporate learning with play.

It was day one of my friend, Robin, and my homeschool preschool experiment with our two daughters. We started off with preschool-age story time at our local library, where the theme was Dragons and Castles and the Letter D. The girls had a great time listening to a couple stories and singing along with the songs. Afterward, we went back to my house and decided to carry on with the Letter D theme and make Letter D and Dinosaur sugar cookies!

I made use of this awesome cookie cutter set, made a simple batch of sugar cookies, and frosted them with naturally colored icing!

Naturally Colored Icing
This is more of an idea than a recipe, since I didn't measure anything (that tends to be my default cooking and baking mode!), but this was so foolproof, and it can be changed to meet your icing needs, whether it be for sugar cookies, cupcakes, or birthday cakes. The best part is, the coloring used is real fruit and I actually flavors the icing! If you want a deep, rich concentration of color, you can use less powdered sugar and more of the fruit powder (or try using only fruit powder to eliminate refined sugar.) If you want a pastel color, only a little fruit powder is needed.

You'll need:
-Heavy Whipping Cream (or Coconut Cream for dairy free)
-Powdered Sugar
-Freeze dried raspberries or strawberries (for red or pink)
-Freeze dried blueberries (for blue or purple)

First, grind about 1/4 cup of each of the freeze dried fruits in a spice or coffee grinder (I used my baby bullet) until it becomes a fine powder. Next combine about 1/4 cup heavy cream with a couple tbsp powdered sugar until it reaches the icing consistency your are looking for. Finally, add some of the freeze dried berry powder, 1/4 tsp at a time, until the frosting reaches the desired color. Repeat for other color. When you're ready to ice your cookies, pour each color of frosting into plastic ziplock bags, make a small snip in the corner, and use them as piping bags!

This icing turned out delicious! Trader Joe's and even Target have many different varieties of freeze dried fruits, so I look forward to trying this again with other fruits and colors.

The girls had a great time frosting their own cookies (we moms helped too, of course), and had even more fun eating them. While we worked on our cookies, we talked about other things that start with Letter D. Mila answered most of the questions, since she's the older of the two girls, but November listened, and remembered some of what she heard. It gave me a glimpse at the benefits of schooling children of multiple age ranges together.

Afterward, we got some energy out at open play at Seattle Gymnastics, and afterward November and I went home for a nice long nap. It sure was a great start to our homeschool experiment! And this simple and tasty project will be so much fun to replicate again in the future and for holidays!

Saturday, October 4, 2014

Pumpkin Pie Smoothie {Paleo, Gluten Free, Dairy Free}...and starting a low carb lifestyle.

Originally posted 10/4/2014 at www.TessAndtigerlily.com
 
I know, I know, the last thing you need is ANOTHER pumpkin recipe...but I disagree! I was craving the traditional flavors of fall pumpkin in the form of a nutritious smoothie. I wanted it to be pumpkin-y, creamy, and healthy enough to eat for lunch with my daughter.

I also wanted it to be paleo, sugar free and dairy free. Ever since my naturopath informed me that my cholesterol is high, I've been much more conscious about what I'm eating. Most people (including myself) considered me a healthy eater, so it was quite the shock to hear about my rise in cholesterol! The traditional remedy that I found was a low fat diet full of diet foods and less red meat. But over the past few years, I feel like this diet has become less and less supported by science as a healthy diet.

I'm much more interested in a diet full of whole, nutritious foods. And, looking at my diet over the past couple years, I don't think red meat is the problem; I don't eat it very often. I feel like sugar, grains and carbs are more of my problem area.

My mom started eating low carb/high fat last year, based on the recommendation from her doctor to lower her cholesterol and risk of diabetes. She was shocked to get such a counterintuitive recommendation from her doctor (eat bacon to lower cholesterol...what?), but she followed his advice and both her and my step dad have had good results.

I've enjoyed eating the food she's made this past year, and the science behind it made sense. I did a little research (there are tons of websites dedicated to low carb/high fat, paleo, and keto diets. My mom recommended this one) and decided to start implementing some conscious changes.

While I'm not getting obsessive over it (especially when I eat out, or want to try a sample of something delicious at work), I'm limiting sugar, grains, and beans. I'm being conscious not to over-do it with sugar-y fruits. I'm eating more veggies in place of carbs. I'm snacking less and eating better desserts, if any.

I'm also picking my battles with dairy; the older I get, the harder some types get for me to digest. I'm tired of being stuck in the bathroom after drinking a latte! Moderate amounts of cheese, butter and yogurt are fine, but when I can, I'm opting for coconut milk and coconut cream in things that work well with them.

So that brings me back to the recipe! The paleo, gluten free, dairy free, sugar free pumpkin smoothie you can drink as a light lunch! Yes, everything is from Trader Joe's; I work there, so pretty much my entire kitchen is a Trader Joe's showroom!

Pumpkin Pie Smoothie {Paleo, Sugar Free, Gluten Free, Dairy Free}
I use coconut cream for its rich, creamy texture and healthy fats, as well as non-dairy beverage-style coconut milk in this recipe. I always have both at home because I love creating things with the stand-alone versatile coconut cream, as well as using coconut milk for drinking. But if you don't want or have both, 1 cup of full fat canned coconut milk will work just as well! I also feature chia seeds for some healthy omegas and protein, and a banana for natural sweetness.

Serves two
-1 cup (or 1 can) pumpkin puree
-1/2 cup coconut cream
-1/2 cup coconut or almond milk (or dairy, if you drink it)
-1/2 cup (about 3 large) ice cubes
-1 banana, sliced
-1 tbsp chia seeds (ground chia works best in a smoothie, but whole is fine too)
-1 tsp pumpkin pie spice
-1/2 tsp vanilla extract
-6 drops liquid stevia, or your favorite sweetener to taste

Blend all ingredients until smooth. Pour into cups, and top with chopped pecans!
Do you live a low carb/high fat or paleo lifestyle?

Kimchee and Pork Quesadilla

Originally Posted 5/17/14 at www.TessAndTigerlily.com

I made a delicious discovery a few weeks ago: Marination, an amazingly delicious Hawaiian Asian fusion restaurant! I've been twice, and both times had the same thing; kimchee quesadilla with Kalua pork. It was so good, I haven't wanted to try anything else there! I was perfectly happy driving down to Alki beach for a tasty lunch, but I felt compelled to make it at home. And I DID! The results: perfect!

Kimchee and Pork Quesadilla 
Inspired by Marination

You'll need:
Pork shoulder
Shredded cheese (I used mexican blend)
Kimchee
Sriracha sauce
Sour cream
Tortillas
Cilantro

First you'll need to cook your pork. I chose a smaller cut of pork shoulder, covered it in salt and pepper, and then cooked it in a slow cooker on low for 8 hours. When done, it is soft enough to shred with a fork. Delicious!

Next, take a tortilla, and top with shredded cheese, your cooked shredded pork, kimchee, and a sprinkle of chopped cilantro.
Top with another tortilla, warm until cheese is melted. I chose to warm in the microwave until mostly melted, and then grilled it on the stove in a lightly oiled pan, until fully heated, and lightly crispy on both sides.
Next, in a small bowl, mix some sour scream with sriracha sauce to taste, depending on your spicy preference. Cut your quesadilla into wedges, cover with your sriracha sour cream (if you want to get fancy, put sauce into a plastic sandwich bag, cut the tip off one corner, and drizzle it on) and then garnish with chopped cilantro.
Yum!!!
I dare you not to eat it everyday for a whole week.

Sugar Free, No-Cook Eggnog

Originally posted 12/5/13 at TessAndTigerlily.com

After trying homemade egg nog at Thanksgiving dinner this year, I was determined to make my own as well. I had very specific ideas of how it would taste and what I wanted to use: I wanted it to be rich, creamy and traditional tasting, I wanted to use pasteurized egg product instead of raw eggs, I wanted it to be sugar free and alcohol free. 

I was really nervous about making it for the first time so I searched for the perfect recipe. But nothing seemed good enough! Some recipes were too complicated with raw eggs, cooking, and straining. Some recipes didn't include the seasonings I wanted to use. I realized I should just make my own recipe!

I adapted my recipe from here. The result was pure heaven! Thick, creamy, and full of that traditional holiday flavor but without the excessive sweetness of store bought brands. I don't feel like pasteurized egg product is as healthy as whole eggs, but I didn't want to deal with cooking and straining them, so the egg product worked just fine! When it comes to sweetener, I used a powdered stevia that tends to be sweeter than some brands. 1/4-1/3 cup of my stevia is equivalent to 1 cup of sugar. So if you decide to go with stevia, be sure to check the ratio, or start with less, and add more to taste.

Sugar Free, No-Cook Eggnog
1 cup pasteurized egg product (like Reddi Egg)
2 cups whole milk
2 tbsp stevia (or to taste, depending on brand and form) or 1/2 cup sweetener of choice
Pinch of cinnamon
1 tsp nutmeg
1 tsp vanilla extract
I cup heavy whipping cream

Place all ingredients, except for the heavy cream, into a blender and blend until smooth. Next, whip the heavy whipping cream by hand (the way I do it!) or in a mixer until it gets thick, airy and fluffy. Combine the whipped cream with the other ingredients and serve with a sprinkle of nutmeg!

November absolutely loved this egg nog! She calls it ice cream milk. I hope you enjoy it too, and wish you all a merry start to the holiday season!

Homemade Kombucha! {how to brew 2 gallons kombucha}

  
Originally posted 11/5/12 at www.TessAndTigerlily.com
 
Finally I get to share something I've been happy and excited about: homemade kombucha! My friend Abi has been making her own and gave me a scoby mushroom so I can join in the adventure! Here's how I did mine (based off this tutorial)

First, I got my glass (glass is by far the best for kombucha) brewing container. After much research and price/shipping comparisons, I settled on this 2.5 gallon container, because it was the best-sized and priced container I could find that I could immediately buy in person as opposed to waiting for an online purchase to be shipped (I'm impatient like that!)  

Since I had chosen such a large jar, I decided I would brew 2 gallons kombucha, therefor I got 2 gallons worth of ingredients. Halve these ingredients (besides the scoby) if you are only doing 1 gallon.

Ingredients:
-scoby with one cup previously brewed kombucha (whether you buy or inherit from a friend, your scoby will come with this liquid)
-2 cups sugar
-16 black (or green) tea bags 
-2 gallons filtered water
-white vinegar for cleaning
-fruit or juice for flavoring, if desired (after batch is done fermenting)

Supplies:
-stainless steel stockpot
-wood stirring spoon 
-clean kitchen towel and rubber band
-large bowl or plate for the scoby (after batch is done)
-containers for storing and flavoring (I used 16oz mason jars)
-stainless steel ladle (unless you're strong enough to pour a 2 gallon jar gracefully!)

Next, I cleaned my supplies. Keeping everything sanitary is important in kombucha brewing. I chose not to wash my brewing jar with soap, and only used plain white vinegar to clean it inside and out. I ran all my other supplies through the dishwasher, and submerged each piece in white vinegar. Once I started the brewing process, I made sure my hands were always freshly cleaned with white vinegar (I only used soap for an initial hand-washing, rinsed well, and then vinegar only afterward.) Since you don't need the mason jars until the batch has fermented, I didn't wash/vinegar them until the day I was ready to use them. Helpful tip: if you do use anything with a metal lid, dry the lids with a clean cloth to prevent rust.

Now for the fun! Boil 1/2 a gallon of filtered water in the stockpot. Once it boils, take it off the heat, and brew the 16 tea bags for 5-10 min. Remove tea bags when done. Stir in 2 cups sugar.

Pour this mixture into the jar, and add the remaining 1 1/2 gallons of water. Let this mixture cool completely, at least 1 hour. A hot tea will kill your poor scoby!

Once cool, add your scoby and the kombucha it came with. Cover jar with towel, secure with rubber band. Now you wait (peek all you want, but don't move the container around or bother with it) until a new scoby forms on the top of the tea, and your tea becomes a sour-slightly-sweet concoction, usually 7-10 days. My magic day is 8; it produces a tasty tea reminiscent of hard cider. You can experiment with the flavor you like best. The longer it sits, the more sour it gets. I had to let mine sit for about 10 days this last time, but it tasted great.

Once your tea is finished, wash your hands with white vinegar, remove scobys (you will have two, the original and the new 'baby,' I then reserve one scoby in a mason jar filled with kombucha and covered with a towel/rubber band. This becomes my reserve scoby that I can save in case something happens, or I can give it away.. Then I place the baby on a plate or in a bowl and cover with some kombucha. I set this aside, along with about 1 cup of freshly brewed kombucha in order to start my next batch.

To bottle your finished tea, pour the kombucha into storage jars using a ladle (or free pour if you are brave) and seal. Helpful tip: if using mason jars with metal lids, after pouring in the kombucha, dry the outer rim of the glass with a towel before sealing to prevent rust. Refrigerate and enjoy.  


To make flavored kombucha, pour some frozen or fresh fruit or juice into the storage jar (just a few tbsp fruit, or 1/2 inch juice) before adding the kombucha. Then seal and leave on the counter an extra 2-3 days. After that, move them to the fridge and enjoy!
The flavors I have done (I used frozen fruit); strawberry basil, blueberry rosemary, plain strawberry, plain blueberry, mixed berry, and mango. This is so much fun to make, and saves a lot of money, if you frequently enjoy store-bought kombucha. It was so much easier than I thought it would be, and I quickly got the hang of the process, and found it to be quick and easy, even with November running amok. Have fun brewing yours!


Gluten Free Dairy Free- one month update

Originally posted 4/20/2012 at www.TessAndTigerlily.com
 
It will be a week tomorrow since I've been on the Gluten Free Dairy Free elimination diet. While I didn't see too many improvements in November's skin condition early on, I have to say that her skin looks much improved over the past couple weeks! We don't get a professional (pediatrician's) opinion until next Tuesday, but I have a feeling she's going to tell me to keep on with what I'm doing. This will probably be my last weekly update; I think I will post monthly from now on, since I'm really getting the hang of this diet and don't have a ton of new meal ideas to post the farther along I go. But here's what I can share from this past week...

I've been eating much of the same as I've already mentioned in week one, week two, and weeks three/four. Here are some new meals we've enjoyed! You'll see a lot of repeat ingredients throughout; I've been trying to take advantage of leftovers!

Breakfast:
-I've been getting pretty bored of my daily bowl of gf cereal and soy milk. Today I switched it up with Udi's gf whole grain bread (which I have decided is the WINNER and by far my FAVORITE gf bread, along with their hamburger buns) topped with Earth Balance vegan butter and strawberry preserves along with a bowl of fresh strawberries.

Lunch:
-My favorite work lunch has been Trader Joe's handmade corn tortillas filled with hummus and Emerald City salad from the PCC deli.
-Sandwich with Udi's bread, cilantro mayo, salami, Mama Lil's spicy peppers, and pickles
-Udi's burger bun with cilantro mayo, sliced pepperoni, avocado, and Mama Lil's peppers

Dinner:
-Wheatless in Seattle pizza crust with fresh homemade pesto (basil, olive oil, garlic, salt, pine nuts), sliced pepperoni, and Mama Lil's peppers
-Portobello Mushroom 'Pizza' (Portobello mushrooms gill-side up, covered in your favorite pizza toppings, and broiled. We topped ours with vegan cheese, pepperoni, tomatoes, and caramelized onions.)
-Shrimp tacos
-Big green salad with sliced salami, garbanzo beans, hard boiled egg, canned artichoke hearts, basil, and balsamic vinaigrette
-Udi's burger buns with homemade beef burger patty's, cilantro mayo, caramelized onions, and avocado
-Spencer made gf fried chicken (with Namaste gf flour) with grits!

Dessert:
-Glutino gf chocolate cookie creme sandwiches! So good...better than oreos!

What a yummy week! Hopefully I'll do some baking in the coming weeks!

Gluten and Dairy Free weeks 3 & 4 {plus chocolate toffee cookie recipe

These past two weeks have flown by! This gluten and dairy free elimination diet seems to be getting easier and easier. I don't even desperately crave the things I can't have! I see cheese, and for one second I wish I could eat it, but then the feeling is gone and I'm satisfied. All the meals we've been eating that used to include cheese, taste great without any! I never knew I could enjoy enchiladas and risotto without tons of cheese included, but I do! Even in the days when I was vegan a few years ago, I would put vegan cheese on everything. I've put vegan cheese on a few things recently, but I usually find that I prefer my meals without! I think if a recipe is well-seasoned and full of fresh flavor, you don't need extra cheese. That's where Spencer really rocks my world...he makes such wonderful, flavorful food!

What I've been eating: Since I've been so busy, I didn't keep a food journal like I did the previous weeks, but I've mostly been eating the same things as discussed in week one and week two, so I'll share the new things I've enjoyed:

Breakfast:
-I've really been eating much of the same as the first two weeks in this category; gluten free cereal with soymilk, green smoothies, gluten free toast with vegan butter
-I've enjoyed more of the Mochi that I mentioned in my last post and have found my favorite combo: chocolate mochi filled with chocolate hazelnut butter and sliced banana or strawberries! So good!
-Spencer made us a couple breakfasts, usually consisting of hash browns (sometimes with chopped tomatoes and asparagus tips) with eggs and gluten free toast. He also made us grits with bacon and eggs!

Lunch:
-I've enjoyed more deli salads or hot bar entrees from PCC when I'm at work. A couple days I made a wrap with brown rice tortilla (warmed in the microwave a few seconds to soften) filled with PCC deli tofu caper spread, lemon tahini sauce, sliced deli ham, and their emerald city salad. The tofu spread and tahini sauce contained enough to make quite a few wraps, and I just got two slices of ham and a small scoop of the salad from the deli each day that I made the wrap. It was so good!
-If I'm at home, I'll usually put something together with leftovers. I made a meatball sandwich with gluten free bread and leftover marinara and meatballs. I also made a wrap with brown rice bread and leftover bbp pulled pork.
-Robin and I got Pho one day. I avoided soy sauce and the hoisin sauce, but siracha seemed to be free of gluten!
-Spencer and I had sandwiches at Chaco Canyon! They have a lot of gf options, as well as a lot of tasty raw items! I got the artichoke melt on gf bread.

Dinner:
-I haven't made much for myself for dinner these past couple weeks; Spencer has been the real star lately! He made a homemade bbq sauce to make the most delicious pulled pork sandwiches ever! We ate it on Udi's gf hamburger buns! The buns were on the small side, and I thought they wouldn't be filling, but I was wrong; they were perfect! He made a broccoli slaw with this meal that was to die for!
-Risotto with english peas or asparagus tips and bacon (and a sprinkle of nutritional yeast for that parmesan quality!
-When we wanted something light we had a big salad with hard boiled eggs, tomato, and asparagus tips with a tasty vinaigrette and an avocado and sprout sandwich on Manni's gf sandwhich bread (from PCC.) I didn't find a link to the exact bread we used, but upon finding their website, I realize they make gf fresh pastas too! Now I've gotta find and try those!
-Spencer made gf chicken strips with namaste gf flour blend and cornmeal
-Enchiladas and chips with salsa and fresh guacamole from Cactus (they have gf options, I told the waiter to leave off dairy too)
-Brown rice spaghetti with homemade meatballs and marinara
-I went to a Game of Thrones premier watching party where my friends were making lamb gyros. I brought brown rice tortillas and lemon tahini sauce and my friend Alicia provided dairy free tza ziki sauce. I avoided the feta but was able to eat all the other topings, like tomatoes and kalamata olives!

Dessert:
-And now it's time for the most exciting part! I made these amazing Chocolate Toffee Cookies from this recipe from Smitten Kitchen, but I de-gluten-ized and un-dairy-fied them! They were soft and chewy fresh out of the oven, but even better after cooling; crispy (like a meringue almost)on the outside, and soft on the inside with chewy bits of toffee and crunchy walnuts. I'm not usually a fan of walnuts in cookies, but they were very welcome in these, probably because we toasted them fresh before using. And a sprinkling of high-quality flake salt on top make these absolute perfection!
Gluten and Dairy Free Chocolate Toffee Cookies (contains eggs)
Adapted from Smitten Kitchen

Ingredients:
1/2 cup gluten free flour (like Namaste)
1 teaspoon baking powder
1/2 teaspoon sea salt
1 pound bittersweet or semisweet chocolate, chopped (I used Callebaut from the Whole Foods baking chocolate section)
1/2 stick (or 1/4 cup) vegan butter (like Earth Balance)
1 3/4 cups packed organic brown sugar
4 large eggs
1 tablespoon vanilla extract
6oz non-dairy english toffee, coarsely chopped (I got this one at Sidecar in the U-dist)
1 cup walnuts, toasted, chopped
Flaky sea salt for sprinkling (I used Himalayan pink salt)

Directions:
Whisk together gf flour, baking powder and salt.

Melt the chocolate and butter by placing them together in a metal mixing bowl set over a pot of simmering water over med-low heat (double boiler style). Stir until melted and smooth. Remove bowl from heat and let cool to lukewarm.

In a large mixing bowl, beat the eggs and sugar together until thick and smooth. The original recipe calls for an electric mixer for 5 minutes; since I don't have one, I sat down in front of the tv and beat that butter and sugar for about ten minutes and I could tell the brown sugar was fully incorporated with the eggs. Beat in vanilla and chocolate mixture. Stir in flour mixture, and then the toffee and walnuts. Chill batter until firm, at least one hour in the refrigerator.
If you would like to bake them now, preheat oven to 350°F. Here's where you can choose what works best for you: you can bake them all at once by lining a couple baking sheets with parchment paper and dropping dollops of about 1/4 cup of batter onto the sheets, leaving a couple inches in between the dollops of dough, top with a sprinkle of flaky salt, and then bake for 12-15 min. Or you can bake what you want now, and freeze the rest in a cut-and-bake log, OR you can just put the whole batch into a freezer log and bake the cookies later. I chose to bake 8 cookies immediately after the dough was chilled, and then freeze the rest. To make a freezer log, roll out the chilled batter onto parchment paper and form a log. Roll up the log in the parchment, and wrap with plastic wrap to keep it nice and tight. Now that you have your freezer log, you can just unwrap it whenever you are ready to bake, slice off about 1/2 inch discs of dough, sprinkle with salt, and bake according to the directions above! So far, I've made 8 fresh, 8 from frozen, and have about 8 left in my freezer log.
Originally posted 4/12/12 at www.TessAndTigerlily.com
 
I KNOW you will want to eat these fresh out of the oven, which tastes amazing, especially with some vanilla rice or soy ice cream, or even blackberry sorbet, but make sure you cool some all the way so you can taste the cooled version too! It's amazing how different they are upon cooling. It is not to be missed! Enjoy!

Gluten and Dairy free week 2 {plus cheesecake brownie recipe}

Originally posted 3/30/2012 at www.TessAndTigerlily.com
 
Another successful week (well, last week only consisted of a few days) of being gluten and dairy free! I did have a few accidental slip ups, like when we went out for sushi at Blue C Sushi. The difference between soy sauce and tamari had slipped my mind, and I was thinking soy sauce was wheat free, and tamari was not. So there I was, happily gobbling up sushi smothered in (what I am now assuming was) non-gf soy sauce. Also, at that same meal, I got so excited when I saw a gluten free cupcake coming my way down the conveyor belt, that I snatched it up and relished its moist, sweet, fluffy goodness before remembering that I am also avoiding dairy, which was most likely present as butter in my now-consumed cupcake. But oh well, it's a learning curve and besides that, I did pretty well! Oh, except for the horrible detox symptoms.

Since I am no stranger to cleanses, dairy free and even gluten free diets and food products, I thought my body would handle this elimination diet like a champ without any complaints. I don't remember having any detox symptoms when I abruptly went vegan about four or five years ago, and I remember feeling amazing while on the master cleanse, and during my time as a raw foodist. But this time around, I was in for a shocker. For the first five days, while my body felt great, my emotions were in turmoil. I was on edge, easily upset and agitated, tired, having mood swings, crying spells, and had restless legs and insomnia for a few hours a night. I felt groggy, foggy, and just plain out of it. I was starting to get worried until, on a hunch, I looked up 'detox symptoms when eliminating gluten.' And there it was; ALL of the above were symptoms of a gluten detox. I read something about how gluten does something to the serotonin receptors in your brain, resulting in the mood swings and depression during those early days of elimination. It did make me feel better, knowing that I wasn't just going crazy!

Now that I am past the detox stage, I feel much better. It hasn't been too difficult, not even when meeting up with friends or going out to eat. When I know I'm going somewhere that won't have anything I can eat, I just eat beforehand. And when we need to eat while out and about, we think about the many gluten and dairy free options out there, like sushi!

What I've been eating: I've been eating much of the same as I mentioned in my last post. Here's a few new things:

Breakfast:
-On our day off together, Spencer made me a delicious egg scramble with rosemary ham and spinach with a side of rice bread smothered in vegan butter.
-Yesterday I tried out this Mochi that our pediatrician recommended for a yummy breakfast. I got the chocolate flavored mochi, cut a few small squares, toasted it in the oven according to the directions on the package, and then cut them open and filled them with peanut butter and sliced banana. I served them with more banana and Trader Joe's organic vanilla soy yogurt.
I'd previously only had the soft, sweet, squishy mochi that is either wrapped around japanese ice cream or served as a topping at frozen yogurt shops. This mochi is less sweet, heartier in texture, and made with whole grain brown rice. When it toasts, it puffs up, like a mini rice pudding muffin! I enjoyed it.

Lunch:
-For lunch, I am sometimes at work. There, I usually go to the Issaquah 
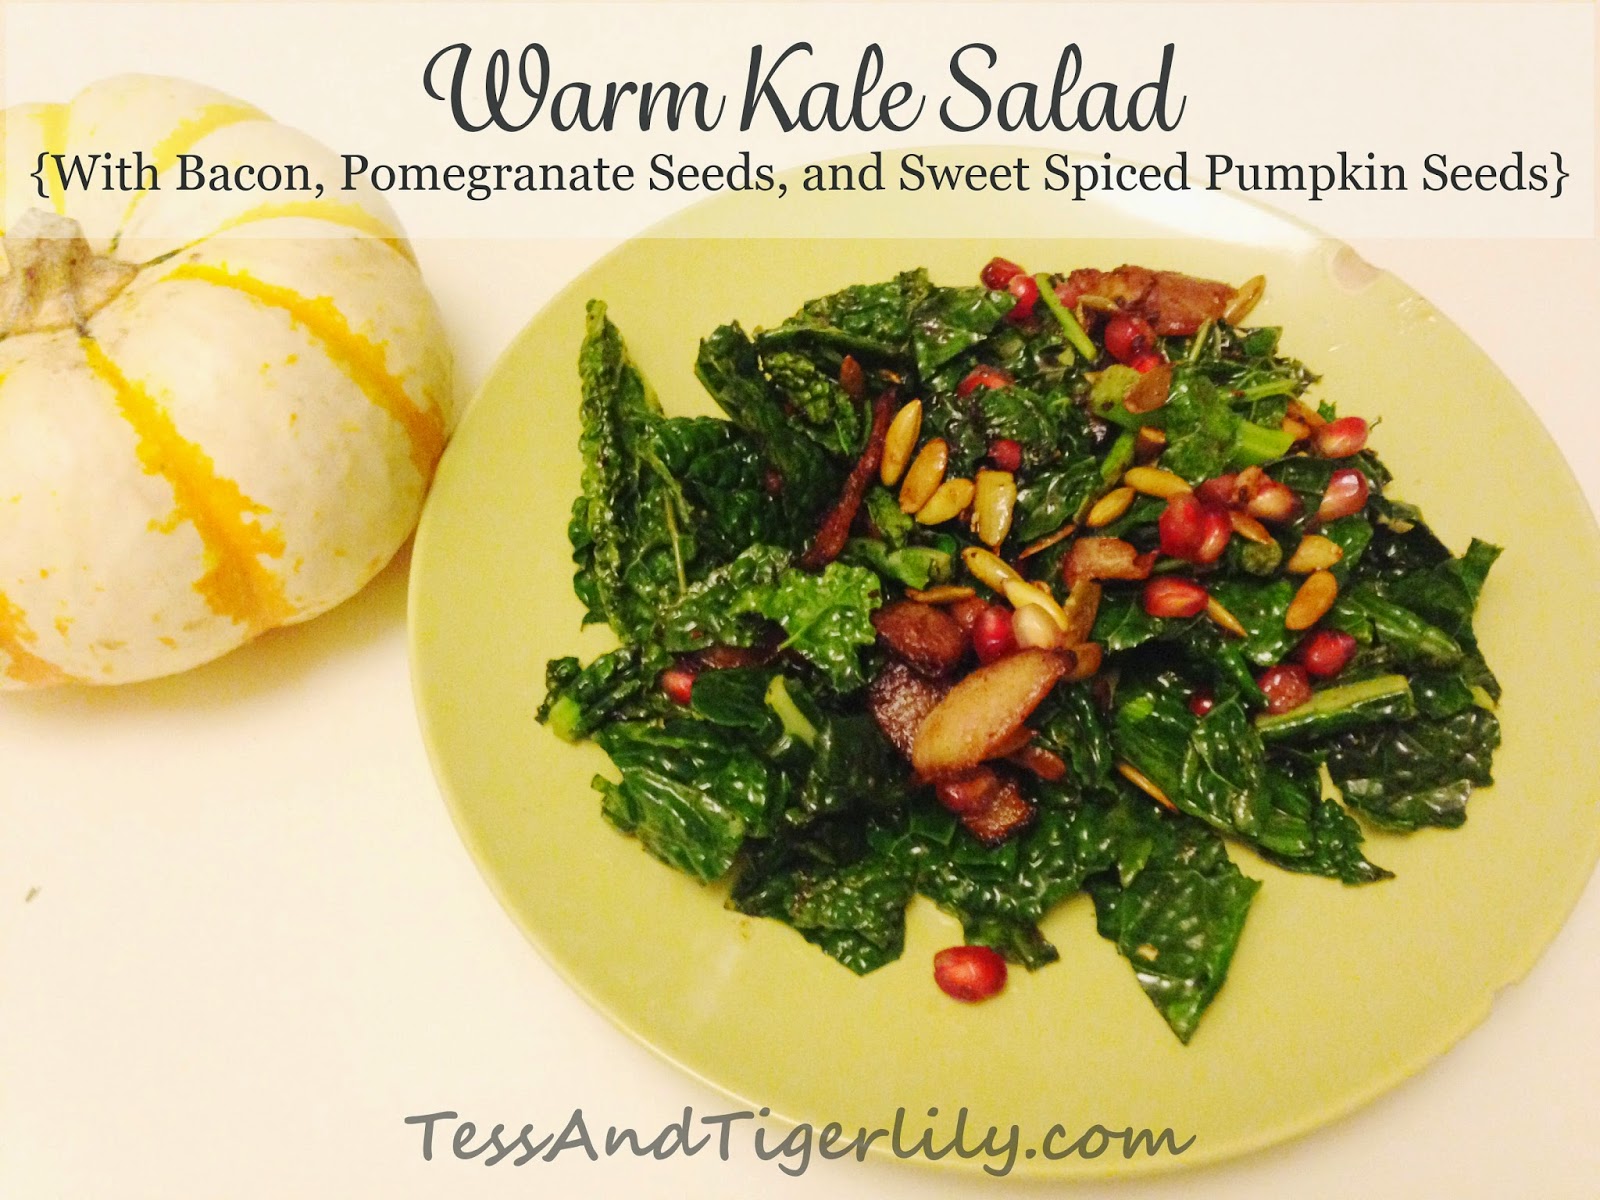
PCC (no, I don't often eat lunch from Trader Joe's, I like to get out for a bit!) and scan the hot bar or deli for gluten and dairy free items. This week they had delicious peanut sauce and mango curry tofu dishes! I got them with quinoa and roasted veggies. Another day, I got their Turkish garbanzo salad, and their yam and kale salad.
-One day this week, I met up with my friend, Sharon, for her birthday at Remedy Teas. She and her friend ordered the tea service. Since it came with too many things that I couldn't have, I ordered my own tea and snack. Luckily, they had a super delicious gf, df chocolate zucchini muffin! I ate it with a pot of 'creme brulee' oolong tea (doesn't actually have cream in the tea itself) with honey and soy creamer. It was my first time at Remedy Teas and I loved their selection of all organic teas in many wonderful, enticing flavors, as well as their selection of gluten and/or dairy free items.

Snacks:
-This week I had 
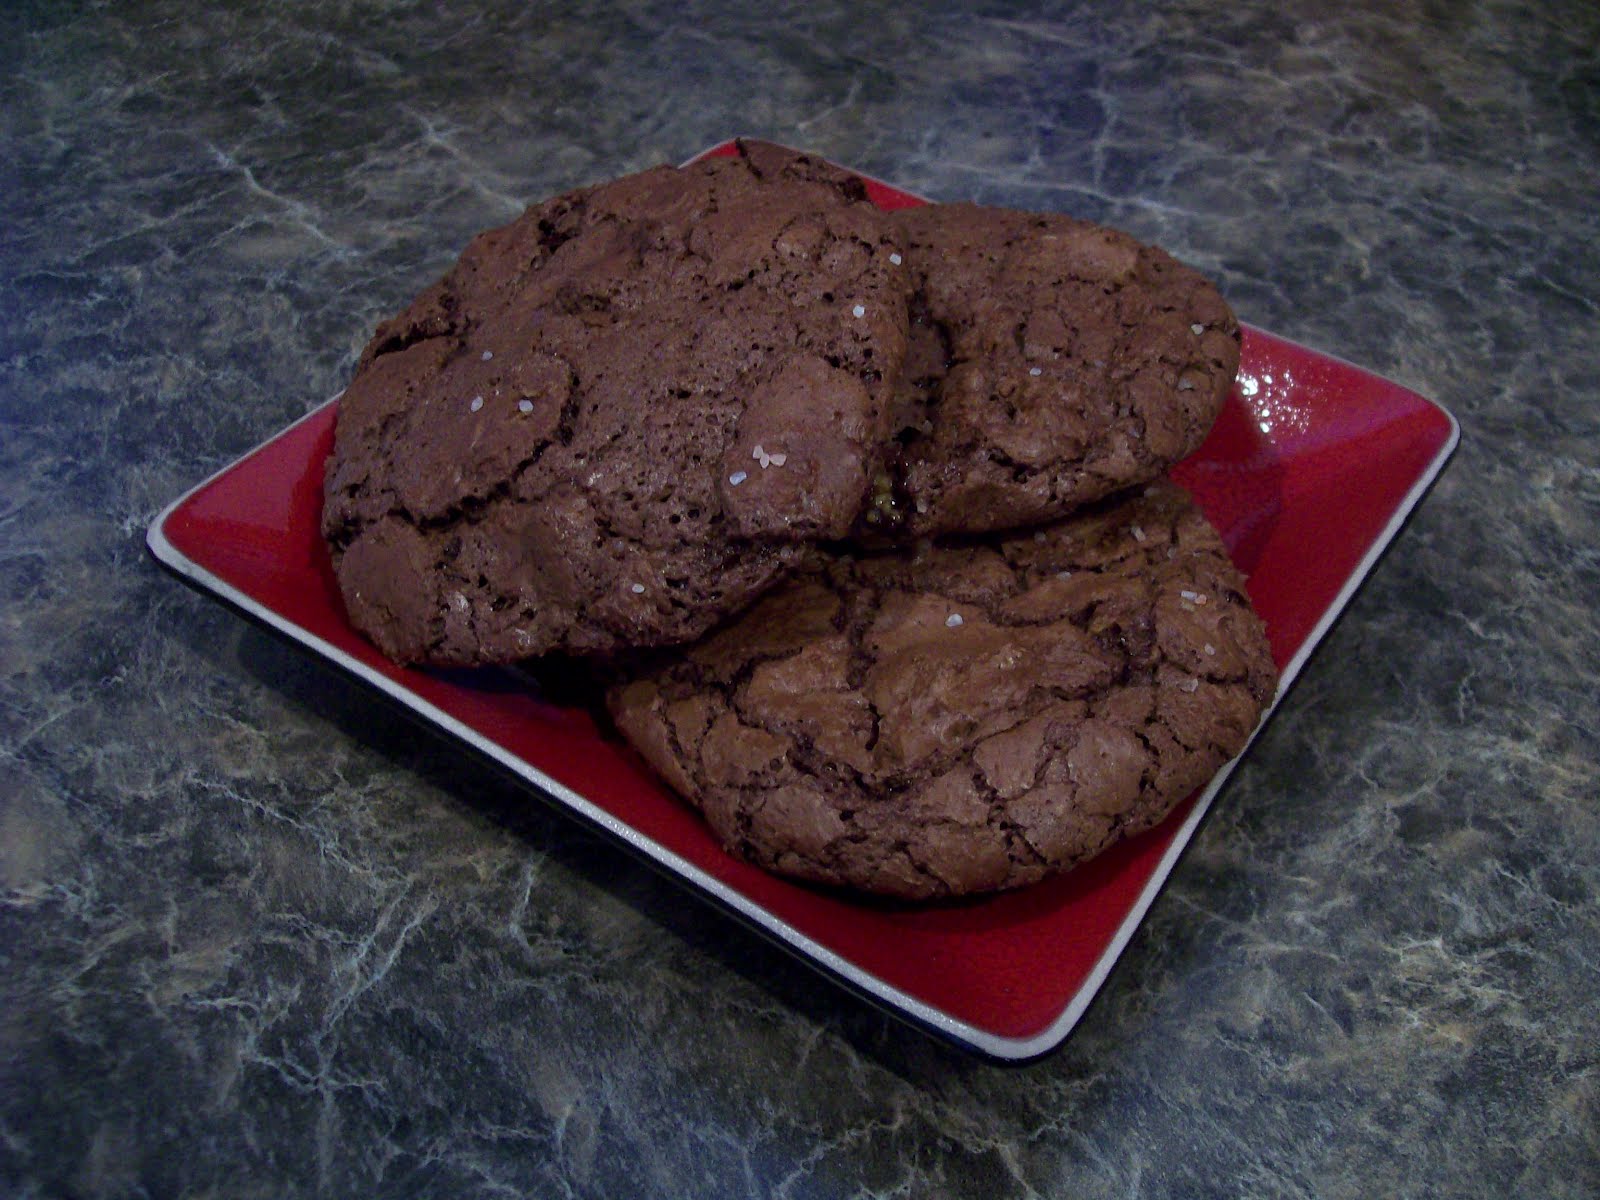
Lucy's chocolate chip cookies and Enjoy Life soft baked chocolate chip cookies. I know these are dessert items, but I ate them during snack times! The Lucy cookies were good, but on the dry, crispy side. If I were a fan of crispy cookies, I would like these, but I am more of an under-cooked-gooey-doughy-cookie kinda girl. The Enjoy Life cookies are perfect for that; they are like soft, sweet bites of cookie dough...but cooked!

Dinner:
-I mentioned my dinner at Blue C sushi. We just made sure to stay away from tempura rolls and any rolls with cream cheese or a cream sauce. Next time I will ask if they have tamari instead of soy sauce!
-Rice pasta with marinara sauce with rice bread covered in vegan butter, salt, garlic powder, and a sprinkle of nutritional yeast.
-Spencer made homemade meatballs with marinara sauce and garlic rice bread!
-I made Dreena Burton's Mac-Oh Geez! I added 2 tbsp nutritional yeast to the sauce, because I love the cheesy flavor. I used brown rice rotelle pasta and used Ener-G gluten free bread crumbs to keep it gluten free. After making it, I feel like I should have added more olive oil and salt to the breadcrumb topping, as it was a little too dry and I kept adding salt while I was eating it. I've made this recipe (non-gf) a couple times before, and have always loved it!
-Last night Spencer made beef fajitas with corn tortillas!

Dessert:
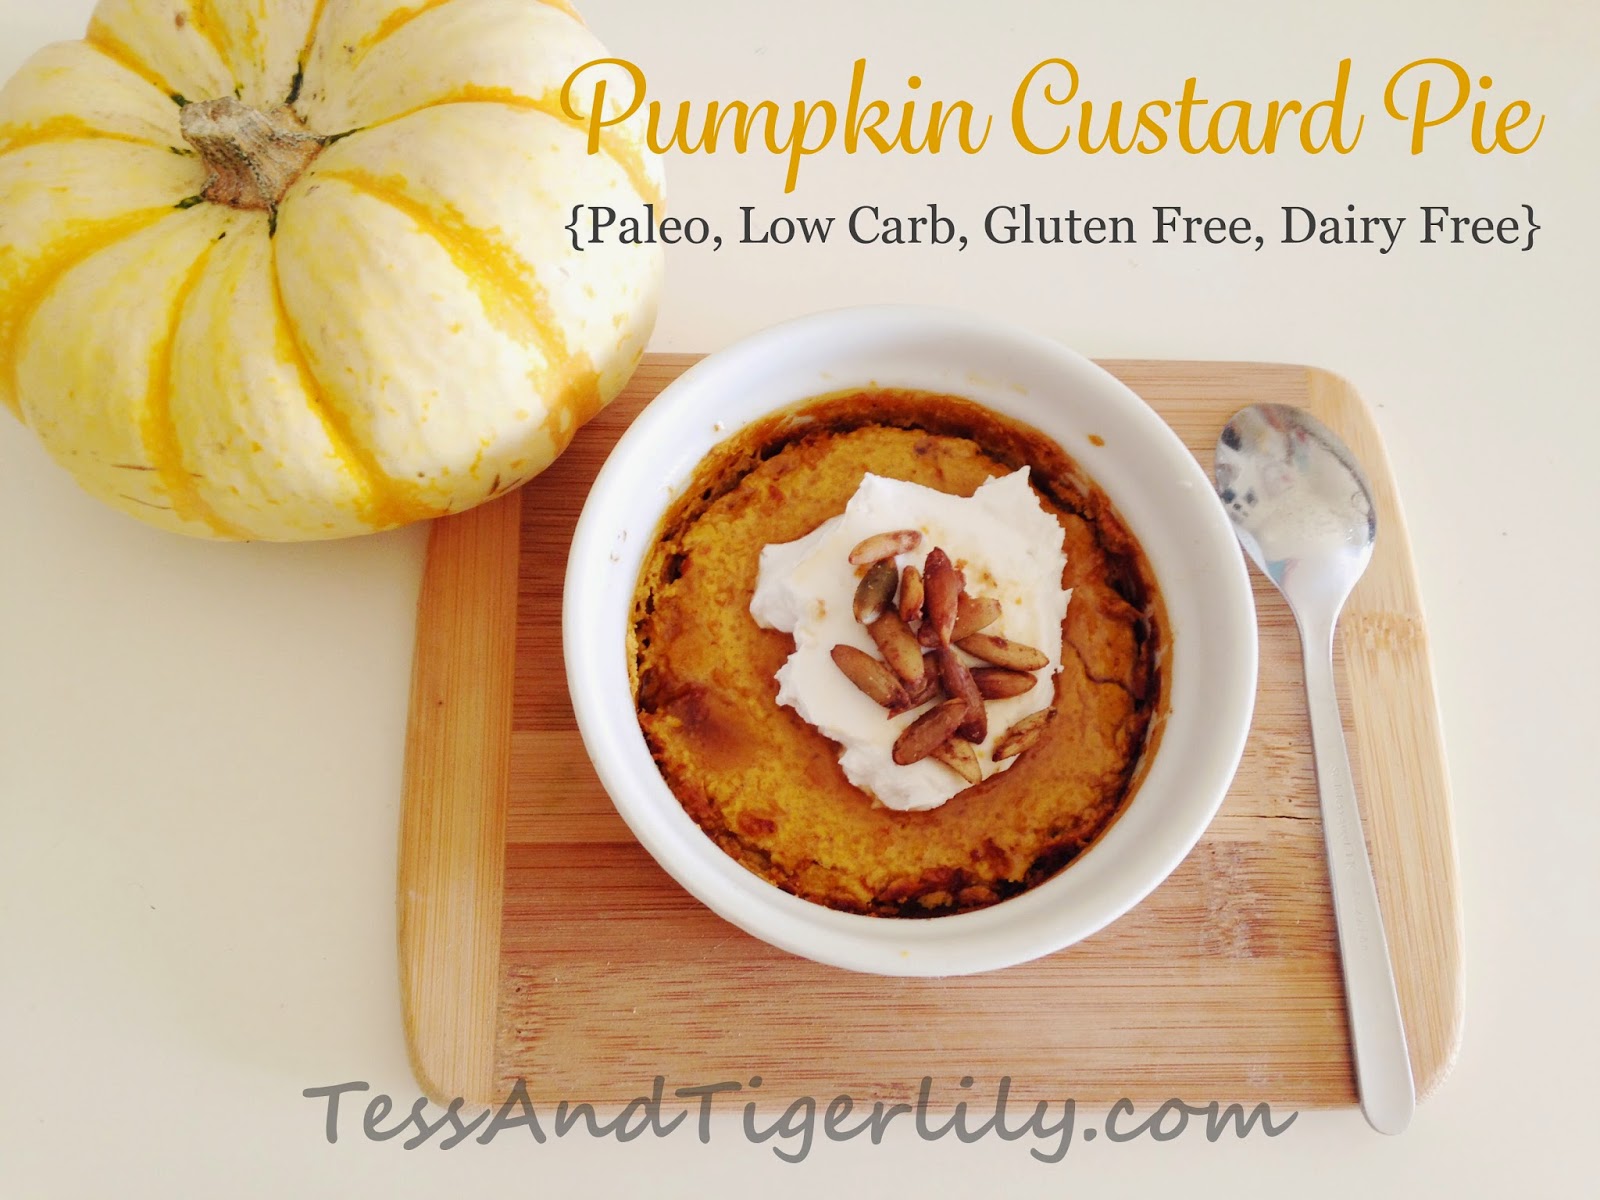
-PCC started carrying Jodee's gluten free, vegan pies. I tried the Butterscotch Caramel. It was so rich and decadent! I could only handle a few bites at a time. There was a strong coconut flavor, since it contained quite a bit coconut meat/butter to get a nice creamy texture, but it tasted great with the butterscotch flavor. When searching for a link to the brand, I realize they have a shop in Greenlake! I'll have to check it out sometime!

-Last night I made Cheesecake Swirl Brownies! I made this recipe from Smitten Kitchen last month and loved it. When I found out about this elimination diet, these brownies were one of the first things I mourned. But, after a bit of confidence-building in the kitchen of late, I decided I could de-gluten-ize and un-dairy-fy it (uh, YES those are real terms!) I wasn't quite ready to make my own gluten free flour blend, so I purchased a pre-made one at PCC. I settled on Namaste Foods Perfect Flour Blend. It claims it can be substituted for regular wheat flour 1:1 in almost any recipe. It worked perfectly! The flour was silky and fine, no gritty texture! Of course, this recipe only calls for 2/3 cups flour, so I'll have to test it out more with cookies and other desserts before I can be certain of its awesomeness, but so far, I'm impressed. For the cheesecake portion, I just swapped out Tofutti non-hydrogenated vegan cream cheese.

The end product was perfection. It was very similar to the flavor and texture of the regular version; firm on the outside, fudgy in the middle, just like I like my brownies to be! The cream cheese flavor was subtler, but the swirl effect was easier to produce this time around, since the tofutti was a little thinner than dairy cream cheese! I don't think anyone could guess these were gf/df! Spencer loved them also. And now, because I know you are salivating for it, the recipe...
Gluten and Dariy free Cheesecake Marbled Brownies (contains eggs):
Adapted from smittenkichen.com

Brownie batter
1/2 cup vegan margarine (like Earth Balance)
3 ounces unsweetened chocolate, chopped
1 cup organic evaporated cane juice
2 large eggs
1/2 teaspoon pure vanilla extract
pinch of salt
2/3 cup gluten free flour blend (like Namaste Foods perfect flour blend)

Cheesecake batter
8 ounces non-dairy cream cheese (like Tofutti non-hydrogenated)
1/3 cup organic evaporated cane juice
1 large egg yolk
1/4 teaspoon pure vanilla extract

Topping
1/2 cup semisweet chocolate chips

Brownie batter: Preheat oven to 350°F. Butter an 8-inch square baking pan, or round pie pan. Heat butter and chocolate in a saucepan, double boiler, or just a metal mixing bowl over simmering water over medium-low heat, whisking occasionally until melted. Remove from heat (and pour into mixing bowl, if not already using it to melt) and whisk in sugar, eggs, vanilla, and salt until well combined. Whisk in gluten free flour until just combined. Pour into baking pan.

Cheesecake batter: whisk together cheesecake batter ingredients in a small bowl until smooth. Pour over brownie batter. Take a knife or spatula, and start swirling, bringing some of the brownie batter into the cheesecake batter until it starts to marbleize. Go slow, so as not to over-do it! Once you get the look you want, sprinkle on the chocolate chips.

Bake until edges are slightly puffed and center is just set, about 35 minutes. Serve warm with vanilla non-dairy ice cream, or at room temperature. Enjoy!

Gluten Free Dairy Free Elimination Diet

Originally Posted 3/24/2012 at www.TessAndTigerlily.com
 
As I mentioned in my last post, I am embarking upon a gluten and dairy free elimination diet in order to see if it helps improve November's skin problems. The past couple days have been quite a change of pace, but not particularly difficult. While my most recent diet has been veggie-focused-yet-omnivorous, I was vegan for two years in the past and I've done all kinds of lengthy cleanses, which is making this new adjustment seem easy in comparison. In fact, I think I will enjoy it, as crazy as that sounds! I was at my most creative, confident, excited, and passionate when I was making foods with dietary restrictions. I don't know why, but there is something so challenging, yet rewarding about making something delicious while avoiding certain ingredients, and reaping the rewards.

Even if this doesn't end up curing Nova's dry skin, it certainly will be cleansing and will force me back into my formerly much-loved kitchen. It's only been a couple days, but I'm already loving it! And since embarking upon this new diet, I realize lots of other moms, friends and strangers alike, are on restricted diets too. I've been searching the web for gf/df blogs, recipes and ideas, and find these fellow mamas are doing the same! So why not share my experience along the way, and add to the mix?

My diet and goals: According to the plan laid out by our pediatrician, I will be avoiding all gluten and dairy, including goat and sheep dairy, but I CAN continue to have eggs. I generally like to eat whole, preferably organic foods, and minimizing over-processed or 'fake' foods. However, that doesn't mean I always follow those principles! I will allow myself some vegan butter, the occasional sprinkle of vegan cheese, df sour cream, etc, should I desire it, especially during the early weeks of transition. But for the most part, I would like to create wholesome, real-food meals! I do eat meat here and there, especially if Spencer makes it, but I mostly like to make vegetable-focused dishes.

What I've been eating: The items in italics will have easy recipes to follow!

Breakfast: (I usually combine two of the following for a filling meal)
-Enviro Kidz Panda Puffs or Koala Crisp cereal with soy or rice milk
-Trader Joe's brown rice bread toasted with Earth Balance Buttery Spread and a sprinkle of evaporated cane juice and cinnamon
-Trader Joe's [NEW!] organic vanilla soy yogurt, served with frozen berries
-Flying Apron lemon poppyseed muffin
-Green Smoothie

Lunch:
-Soup with Wheatless in Seattle sourdough bread
-Mixed green salad with chicken, dried cherries, candied walnuts, sprinkle of nutritional yeast, and balsamic vinaigrette and a side of W.I.S. sourdough bread smothered in prepared Simply Organic sweet basic pesto seasoning mix (contains maltodextrin, which was questionably gf, according to a quick google search), toasted in the oven.

Snacks:
-Green Smoothie
-Living Harvest chocolate hemp milk
-Toasted rice bread or corn tortilla topped with roasted red pepper hummus

Dinner: (usually with a green salad)
-Baked potato topped with Earth Balance buttery spread, Amy's chili, Daiya cheddar style cheese, scallions, and a dollop of plain soy yogurt
-Rice pasta with S.O. pesto, sprinkle of nutritional yeast and pine nuts with a side of W.I.S. sourdough bread
-Fish tacos with corn tortillas, cucumber mango salsa, avocado, and lime soy crema

Dessert:
-Wheatless in Seattle lemon cupcakes
-Rice Dream vanilla ice cream root beer floats

I was so happy to find the W.I.S brand gf/df foods! The sourdough bread had a nice crisp crust with a soft interior. When I toasted it in the oven with the pesto, the interior took on a gooey, mochi-like texture which I enjoyed. The lemon cupcakes are delightful! And the Flying Apron brand always produces wonderfully tasty vegan/gluten free products as well. I am so lucky to live in Seattle where these products and bakeries are everywhere. Working at Trader Joe's also comes in handy, since we carry a good selection of gf staples. The Daiya cheese took a bit of getting used to, but I like it enough. I think I remember liking Follow your Heart Vegan Gourmet cheese better, though. I really like a sprinkle of nutritional yeast for a subtle cheesy flavor. It takes on a shaker-can parmesan quality, especially on fresh stove-popped popcorn!

Now for some super simple recipes! Keep in mind, the following recipes contain approximate measurements, as I've just been throwing stuff together, tasting and adjusting as I go.

Chocolate Berry Green Smoothie: serves 2-4
A few handfuls of kale (enough to loosely fill the blender)
1 banana
1 cup frozen berries (I used cherry-berry blend and blueberries)
1/2 cup plain soy yogurt
1 tbsp agave nectar
1 cup Living Harvest chocolate hemp milk

Blend, adding water to desired consistency. Taste and add more of any flavor you would like to taste more of; berries, agave, yogurt, milk. Drink up! Mine made about 3 servings, so I kept the remainder in the fridge for Spencer, a snack, and breakfast!

Cucumber Mango Salsa: Serves 4 as a taco topping (Spencer showed me how to make this last night!)
-1/3 medium cucumber
-1/2 mango
-1/4 small sweet onion
-small handful fresh cilantro
-squirt of lime
-pinch of salt
-pinch of black pepper
-squirt of tapatio hot sauce (optional)

Chop the cucumber, mango, onion, and cilantro to desired texture (chunky or fine) and mix together in a bowl with the remaining ingredients. Taste, adjust flavors as necessary. Top onto fish tacos!

Lime Soy Crema: serves 4 as a taco topping
-1/4 cup plain soy yogurt
-pinch of salt
-squirt of lime

Wisk ingredients together, and drizzle on top of fish tacos, or any other mexican dish!

I'll post again next week, with more about this dietary change, more meal ideas, and more recipes!